Spider Plant Repot
- Jan 27, 2016
- 3 min read
First is the story of my severely root bound spider plant. Spider plants are a wonderful addition to any home. They are easy to maintain and grow quite well! They dont even mind being root bound. My spider plant was given to me by my friend when it was given to me it needed to be repotted but I was busy and so like all things it got pushed to the wayside. I finally got around to it just the other day. It was a MESS!! In the first picture you can see what the plant looked like before I started.

There are many plants in the pot. There is the mother plant (the largest, with the most roots sticking up out of the ground), and nine smaller plants. The second picture shows how much of the roots are exposed above ground!

When I started taking the plants out, I first tried to take out the dirt around the plants. This was not working!! The roots were so tangled and there were so many that I was unable to dig more than a few inches down. The roots were definitely going to be a problem! I turned the pot upside down and squeezed the sides of the pot and gently wiggled the plants (focusing on the biggest plants and trying to grasp as close to the dirt as possible). I was very careful not to drop the pot or break the plants. When it did start to move the entire thing came out in a clump! This picture shows the plant from the side.

It is easy to see from this view just how daunting this task is going to be!! 😱 The second picture shows the plant from the bottom.

Oh my! The plant was so overgrown that it literally took on the shape of the pot! I knew right away that this was going to be difficult. I started to gingerly separate the roots. This is where you need to be extra careful. It is too easy to become frustrated and just tear the roots. You want to keep as much of the roots intact as possible. Roots provide the plants with water and nutrients. In these next two pictures you can get a sense for how difficult it is to separate the roots.

I worked for quite a while to get the roots separated. You can see in the second picture how the bottom still has the imprint of the pot in the root system.

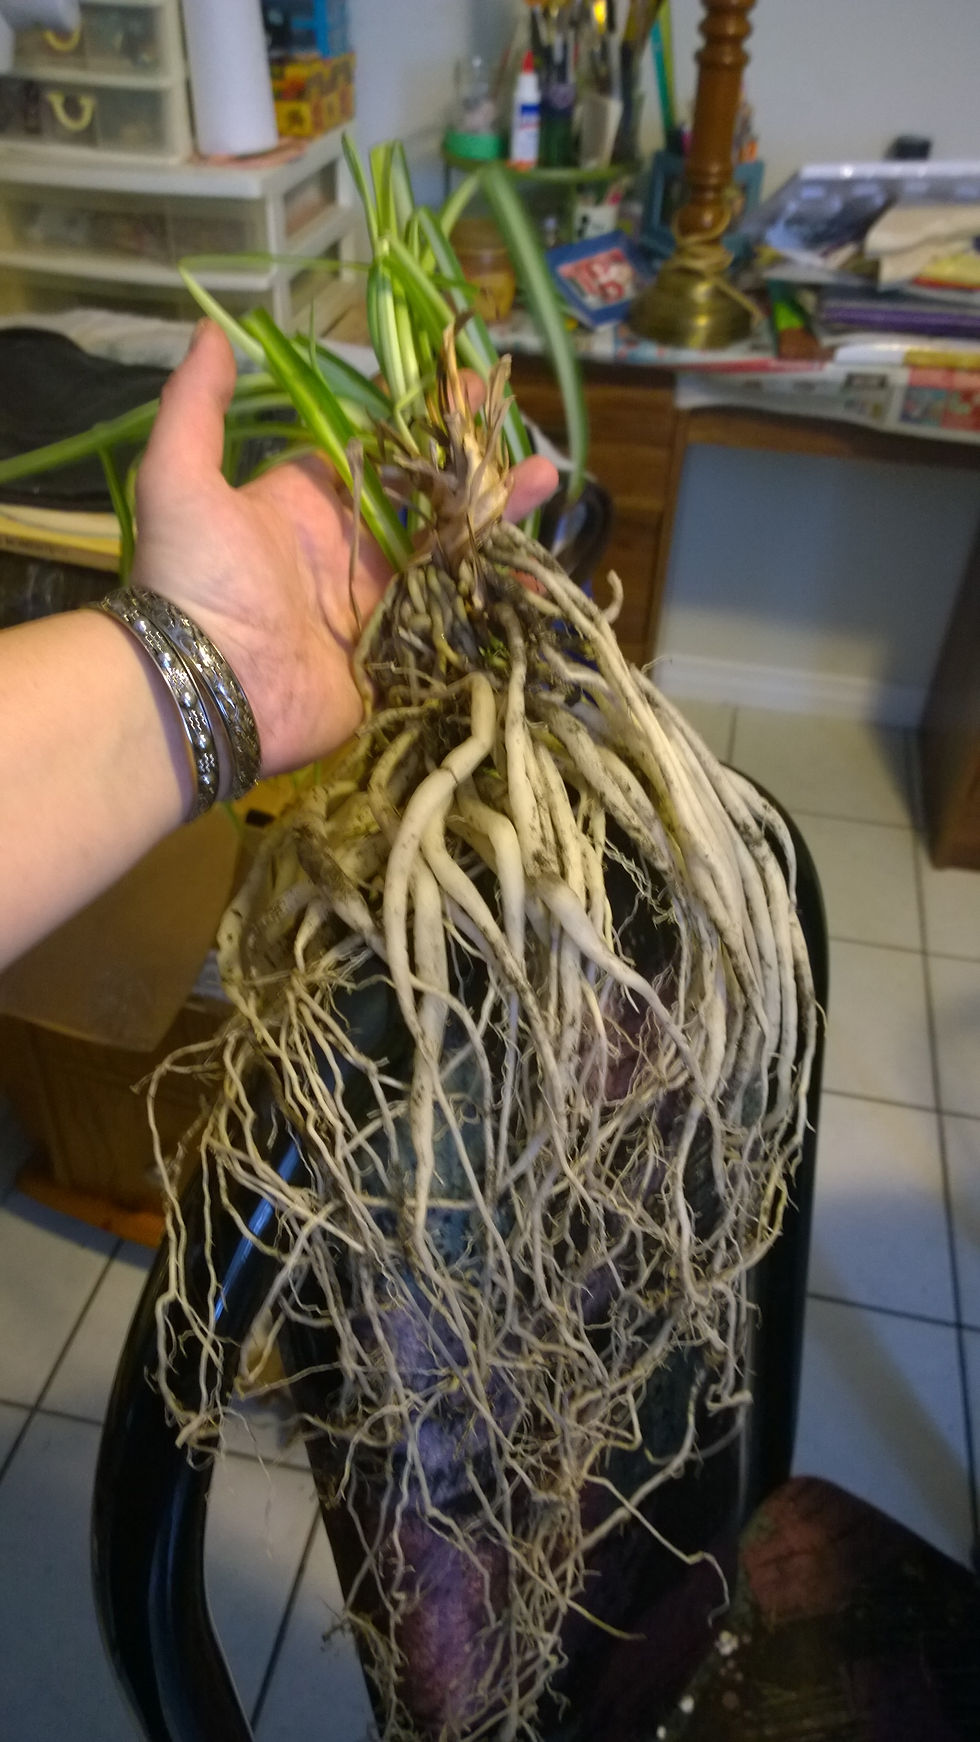
If you needed you can have a short break but be careful not to let the plant dry out as the plant will die if left out of the soil for too long. The following pictures are the plants separated with no soil. You really get a feel for how large the root systems are for the spider plants.


So now you have the plants separated and you are ready to plant! Spider plants like to be planted close together; however, you need to keep enough room for the plants roots to breathe and absorb moisture and nutrients. Once you have an appropriate pot(s) for your plants (remember to pick these out as well as soil and rocks for drainage before taking your plant out of the pot. Grab your pot, throw a few rocks in the bottom of the pot and fill approximately half way with soil. Move the soil around to create a bit of a hole for your plant as shown.

Place the roots and a bit of water into the hole. Add more soil until the roots are completely covered, press gently but firmly to compact the soil around the roots. The plant should look similar to the one below.

If your plant is still looks like it's weeping give it some time. These are all the plants I had separated and replanted.

These are the same plants ten days later. As you can see the plants are standing up again. They have grown about two inches and look healthier than they did before they were replanted.

Comments